Mason Jars, Glass-Lock Storage Containers and Paper Bags Are All You Need To Keep Your Produce Fresh
Sometimes I surprise even myself with the meals I can whip up towards the end of the week – when the fridge is seemingly empty and it’s been a few too many days for the last of the fresh greens. The meal below is the perfect example!
The root veggie and mushroom ingredients for this Autonomy Farms ground beef and Shiitake sauté, topped with golden beets and Cipollini onions had all been in my fridge (stored as per my tips below) for over a month. It may sound gross, but it’s not! Root veggies are traditionally stored throughout the winter in similar conditions.
- The mushrooms in the below sauté were about 3 weeks old and in perfect shape because they’d been stored properly.
- The golden beets and Cipollini onions had both been stored for over a month.
- The Farmers’ Market fresh arugula and parsley were both on day 6.
- And finally, the lightly dried calendula petals were on week 3.
It’s really quite a storage system that I’ve worked out! This meal was as fresh and delicious as it looks! Follow these simple storage tips and I promise you will thank me. You’ll greatly extend the life of your produce – saving you money while locking nutrients in for much longer!

All you need to get set up is these basic tools:
- Salad Spinner with a stop lock mechanism to whisk water off effectively
- Set of Glass-Lock Containers
- A few wide mouth 32 oz Mason Jars
- Why not upgrade to Stainless Steel Lids
- Unbleached Parchment Paper
- Unbleached Paper Sandwich Bags
Leafy and Hearty Greens
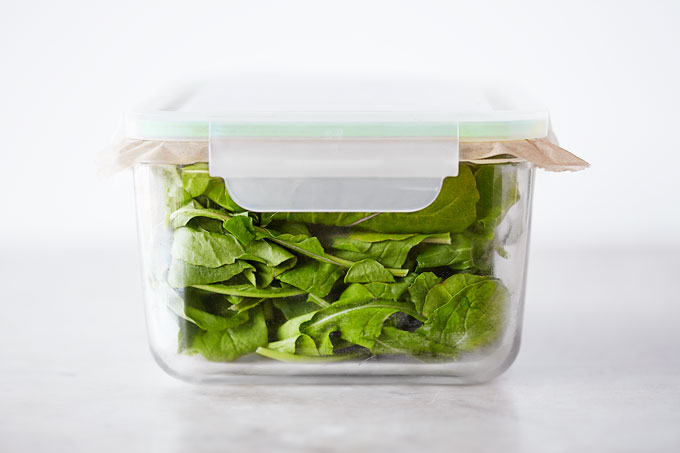
Use this method to store your greens and they’ll stay crisp and fresh for a week or longer. What’s even better is that you’ll be set up with ready to eat greens that can be used at a moment’s notice.
- Wash greens – optionally let soak in a 10% vinegar bath, roughly a few squirts of non-GMO vinegar, for 10 minutes before rinsing the final rinse.
- Using a salad spinner, dry the greens as well as possible.
- Place in a large glass-lock container and store sealed in the warmest part of the fridge.
- To eliminate all contact with plastic, place a sheet of parchment paper between the lid and container. You’ll still be able to snap it shut. See my photo above.
You could alternatively store the dried greens in your salad spinner. But I prefer the large glass container, as salad spinners take up a lot more room. Plus the tight seal of the glass containers works better and I prefer having the greens hanging out for a week in contact with glass, not plastic.
To give you more incentive to, you should know that leaving your greens in a plastic-bag eventually exposes the greens to potentially dangerous bacteria. The humidity in the bag combined with the fact that plastic harbors bacteria, produce a bacteria friendly environment that manifests as precipitation coating the greens. When greens are really wet in those conditions, you would be advised to just throw them out, or at least soak in a vinegar bath.
It’s best to eat greens within 3-4 days of harvest for maximum nutrition, but if you can only buy fresh greens once per week, you’ll at least be getting the most out of your produce this way and avoiding the bacteria found on those moist, plastic-bag stored greens!
Leafy herbs best served fresh, like Parsley, Basil & Cilantro
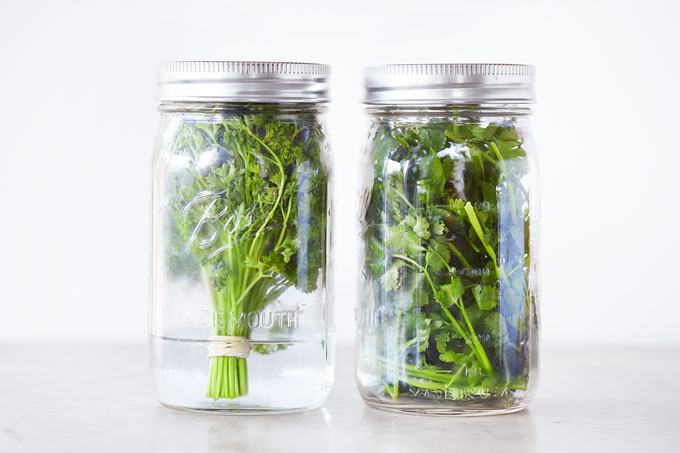
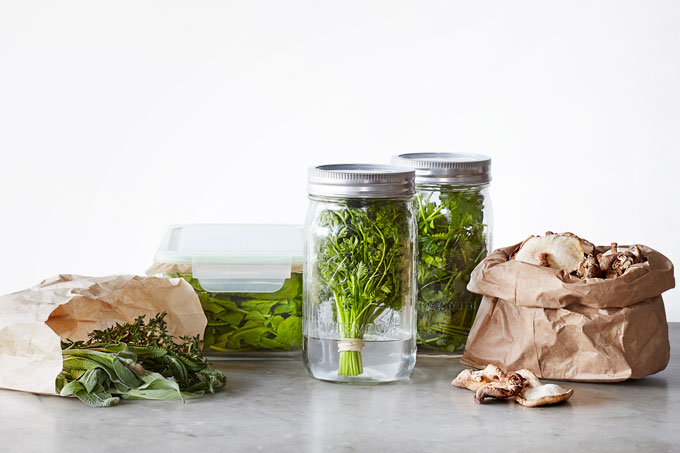
Mason jars are simply the best “herb keepers.” Whether you choose to add water at the bottom and keep your stems in tact as a bunch, or pack the jar with loose rinsed and dried herbs, in either case the herbs will stay in great shape for a week – and in aesthetically acceptable shape for close to two weeks.
Basil is the most fragile of the leafy herbs, but if dried really well, it should stay in good shape using the Dry Jar method for about a week.
If you don’t have a salad spinner, put the herbs in a mesh colander, cover with towel and shake water off as best you can.
- Dry Jar:
- Remove the ends, then wash and dry the herbs.
- Using a salad spinner, dry the herbs as well as possible.
- Place dry herbs in a 32 oz Mason jar and seal.
- Jar With Water:
- Chop off the tips of the stems. Rinse and dry in a salad spinner with the rubber band around the stems in place.
- Otherwise shake off as much water as possible while keeping the bunch in tact.
- Pour a little bit of water into the bottom of the 32 oz jar.
- Place herb bouquet into the jar, pushing down any willy leaves and seal.
Delicate Culinary Herbs & Rhizomes
Although you could store herbs like oregano, mint, and thyme and rhizomes such as ginger, turmeric with the Dry Jar method, you’re going to be better off storing them in a way where they can dry instead of hold onto moisture.
We tend to use those herbs more sparingly and by letting them dry you can continue to use them as they age.
However the Sealed Glass-Lock option is a very good method for storing delicate herbs such as thyme or mint if you’d like to maintain freshness for 1-2 weeks.
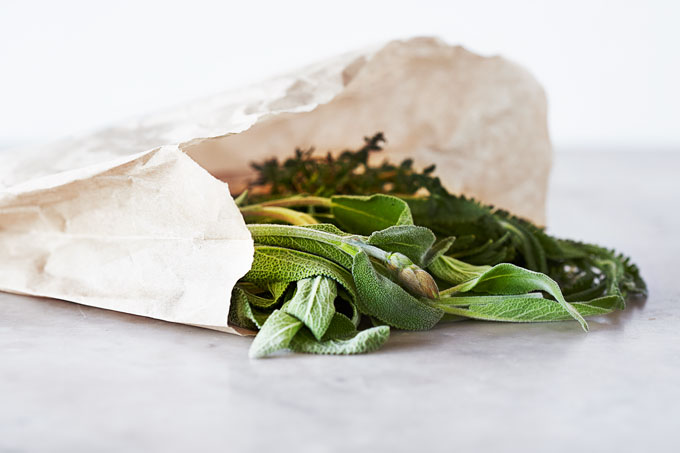
- Paper Bag:
- Loosely spread the herbs out in a paper bag as in the photo above, and keep in the crisper of the fridge.
- Hang To Dry:
- To dry herbs straight away, tie the stems with a rubber band and hang to dry on a hook in the kitchen.
- Once completely dry, transfer to a Mason Jar, seal and store in a dark cupboard.
- Sealed Glass-Lock:
- To keep fresh and perky for over a week, place a damp towel at the bottom of a flat-bottomed glass container.
- Arrange the herbs making sure they have plenty breathing room.
- Keep sealed and store at the bottom of the fridge.
Mushrooms
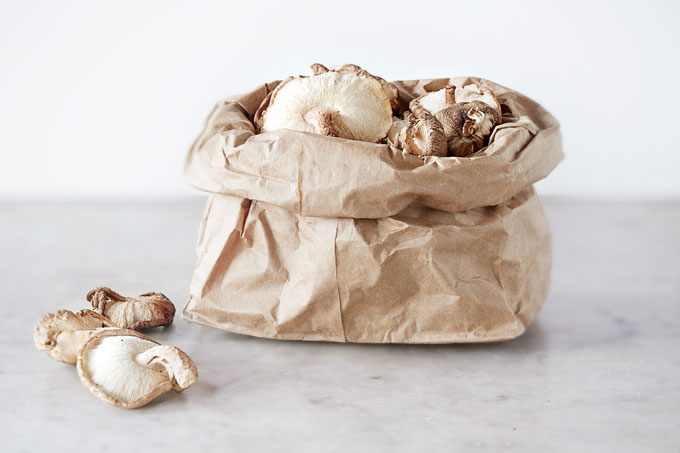
Mushrooms do best stored in a loose paper bag. When buying mushrooms at a grocery store, seek out a paper bag instead of using a plastic bag.
As you can see in the photo above, these mushrooms have been stored in my fridge for over two weeks and have begun to lightly dehydrate. But the underside of the caps is not mildewy and browned as you often find in grocery stores after the mushrooms have been piled up too high and been exposed to prolonged moisture.
Dried, they’ll be just as delicious and nutritious when rehydrated with Homemade Bone Broth during cooking! These simple steps will save you from having to toss those forgotten mushrooms:
- Place in a roomy & dry paper bag.
- Make sure the top is open so that air can circulate.
- For sticky mushrooms like Wood Ear, place sheets of parchment paper between layers to allow for air flow.
- Store in the warmest part of your fridge, usually the bottom.
As long as the mushrooms get enough circulation, by not being packed into the bag too tightly, the mushrooms will dry lightly as they age instead of getting moldy. They’ll stay in good shape for a couple weeks stored this way.
Apples, Hard Fruit & Root Veggies
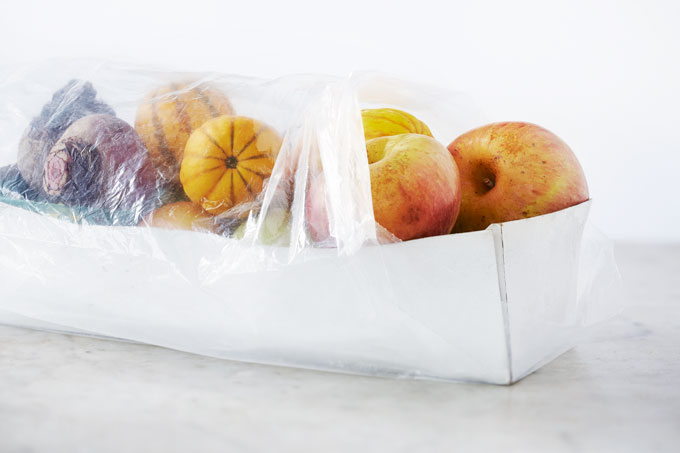
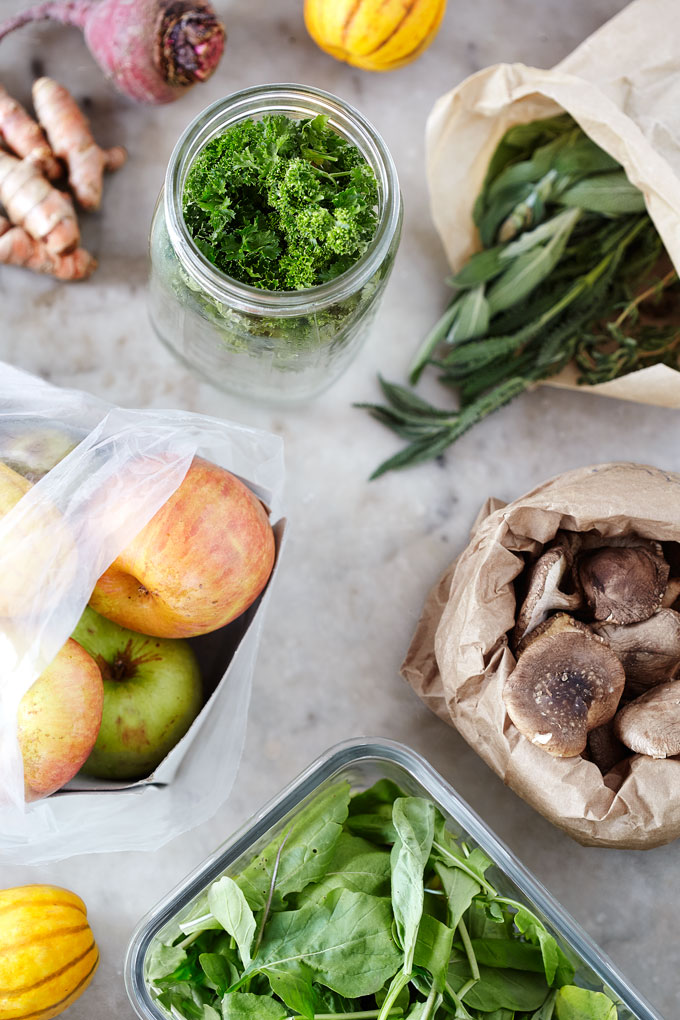
Apples and other fruits like pears, oranges and the like, are best stored in a crisper type environment. This is also true for all root veggies; like beets, squash, carrots, onions, etc.
If you have a basic fridge with limited crisper storage space, use this method:
- Place the fruit in a large glass container or cardboard box.
- Using a large plastic bag, place the box with fruit in the bag.
- Let the bag stay open to allow some circulation.
- To eliminate contact with plastic, use a sheet of parchment paper between the bag and produce.
- Store on lower fridge shelves, or the warmer part of your fridge.
If you’re out of space on the lowest level of the fridge, these guys will do fine on a middle shelf. Just don’t keep them at the very top, or else they may get frost bite. Happy fruit and veggie storing!
